|
Hello! I'm so sorry! There were some unexpected technical difficulties with my last post, so, I'm reposting it. It's a full tutorial, so I really wanted to share it! 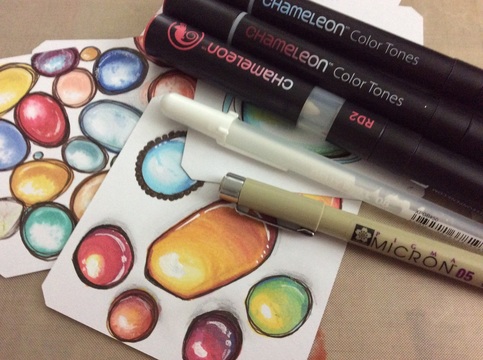 Hello, Creative Friends 😃Today, I want to share a quick tutorial for drawing/coloring Gemstones with Chameleon Pens. It really is easy & fun + you get amazing results! And, if you missed my tips for using Chameleon Pens, you can hop over to that here. On to the tutorial!' Drawing & Coloring Gemstones the Easy Way - with Chameleon PensI've been having so much fun learning to use alcohol ink pens! I love the vibrancy of the color, and the transparency. I love how you can layer them, and see the colors beneath, or create a new color. I love how they seem to capture light. As I always tend to do, I wanted to explore them even further, so I started brainstorming. How can I use these vibrant, light-capturing colors? What other projects have I seen or done where I can use them? I don't think they would work for my Gelli plate! But then, I thought, these would be perfect for eyes! These would be perfect for gemstones or jewels! I could incorporate this into doodles or coloring pages :) Exciting! So, I spent an entire day learning how to make gemstones. Naturally, I wanted to share that with you, my lovely creative friends. I recorded a video tutorial for you, and the tutorial below, + a supply list. Step 1 Gather your supplies. You need paper, scratch paper, a fine line pen, and alcohol markers of your choice, such as Chameleon, Copics, or ProMarkers. (My complete supply list, with links, for this tutorial is at the bottom of this post.) 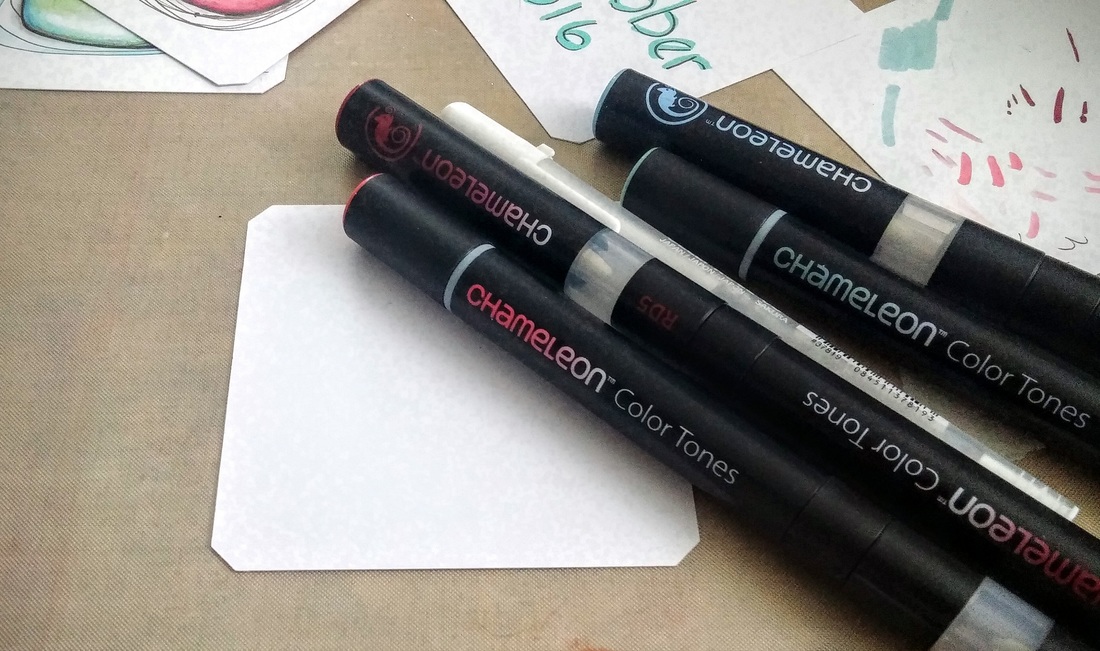 I chose Red Coral and Burgundy for my gemstone. With Chameleons, 1 or 2 colors will work. For others, like Copics, you may need several to create gradient color. You use what works for you :) 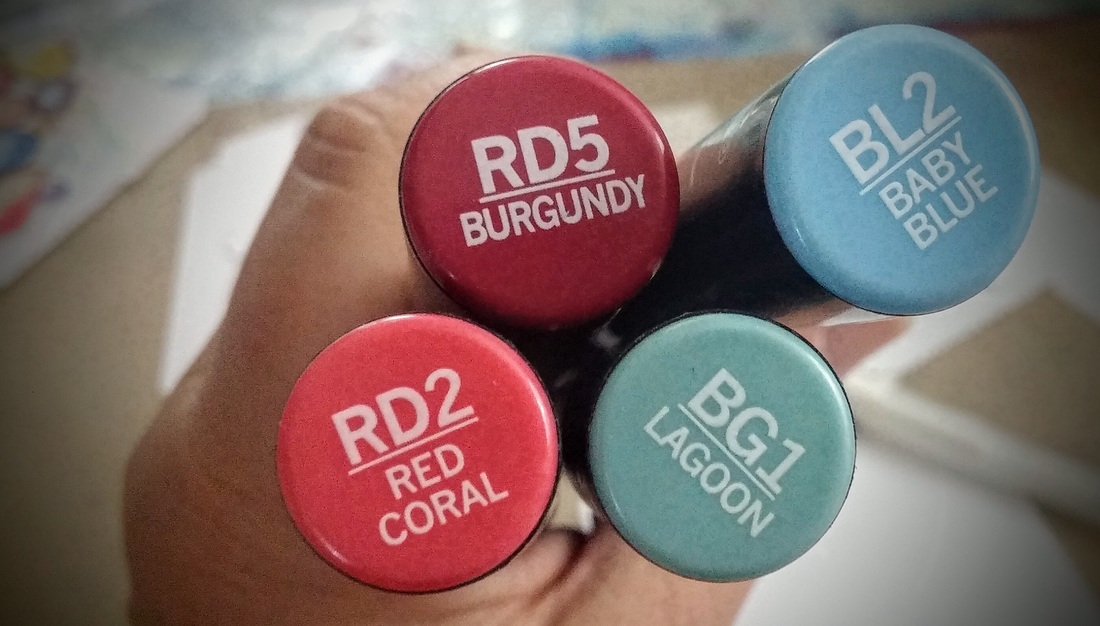 Step 2 Draw a shape for your gemstone with your fine line pen. I chose to draw an uneven circular shaped setting. I'm thinking of a wire-wrapped gemstone. 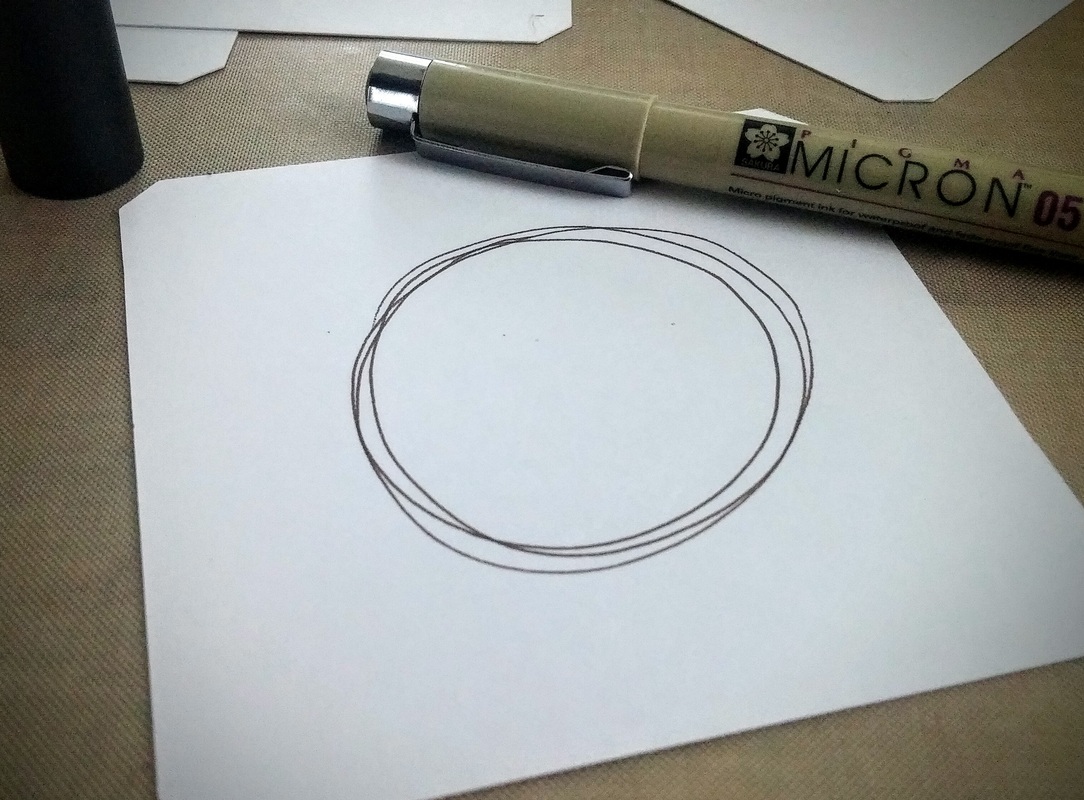 Steps 3-5 Choose where you want the most light to be. Fuse your lightest color pen until the ink is clear. Don't forget to test your pen on a scratch sheet of paper. Begin coloring around your chosen highlight area, and work your way to the edges. As the color gets stronger, move away from your highlighted area. I chose to leave some very small white spaces near the highlight so it will suggest that light is bouncing around inside the gemstone. I also went back and added some darker dots and spots, once the color in my pen was back to full strength. 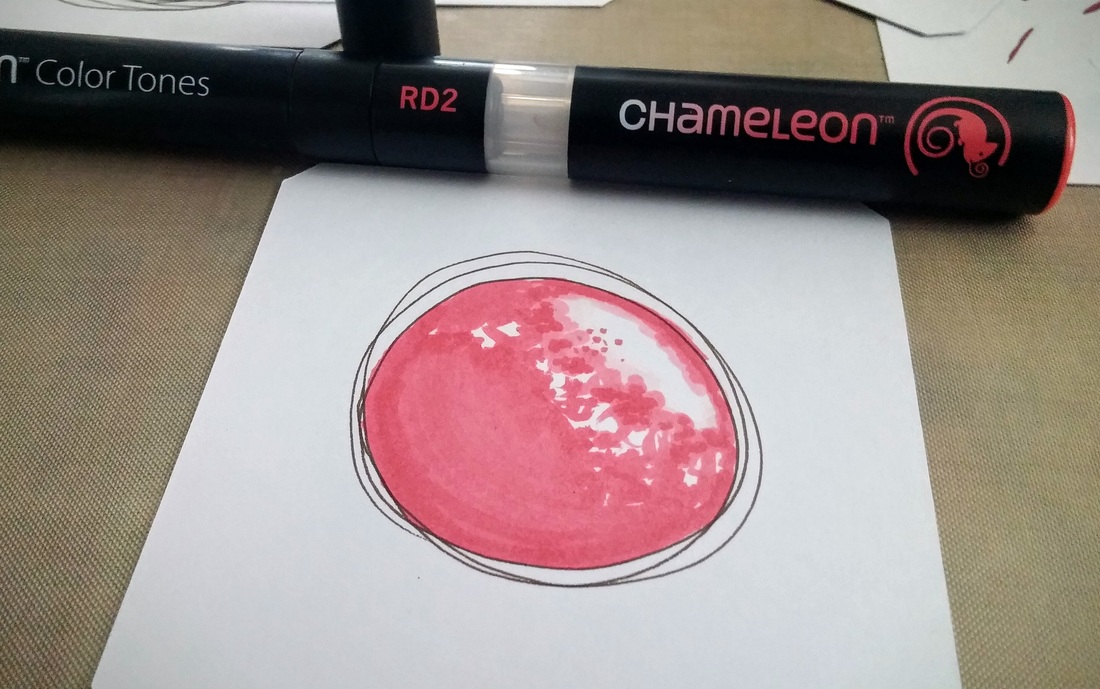 Step 6 Begin to add color with you darker pen. Dot in a few shadows near the highlight. 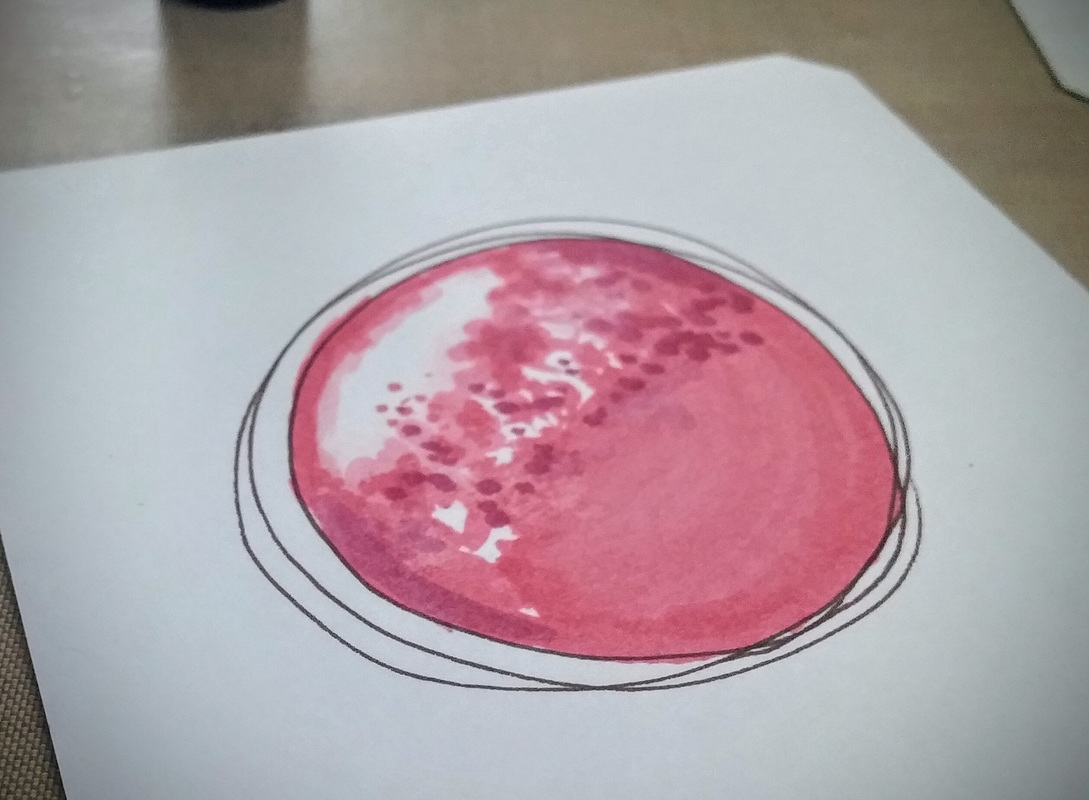 Work around the edges and across the dark side of the gem to add more shadows and depth. No need to fuse at this step. Leave a small crescent shaped area in the lighter tone, as a reflective highlight opposite your larger highlight. 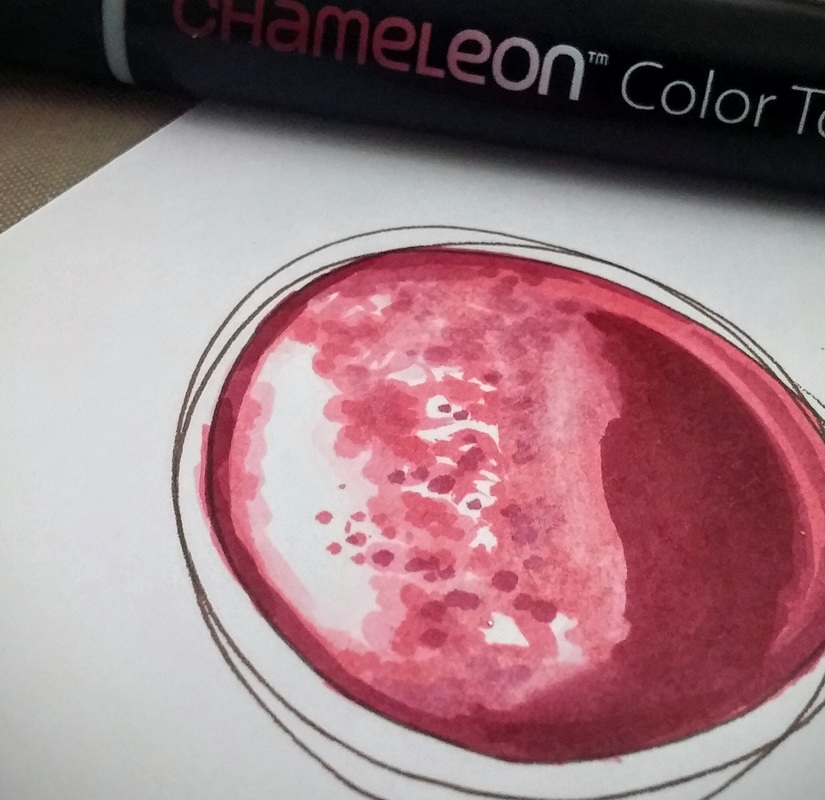 Step 7 Fuse your darker pen to clear or almost clear. Begin coloring across your entire gem, just below your highlight. 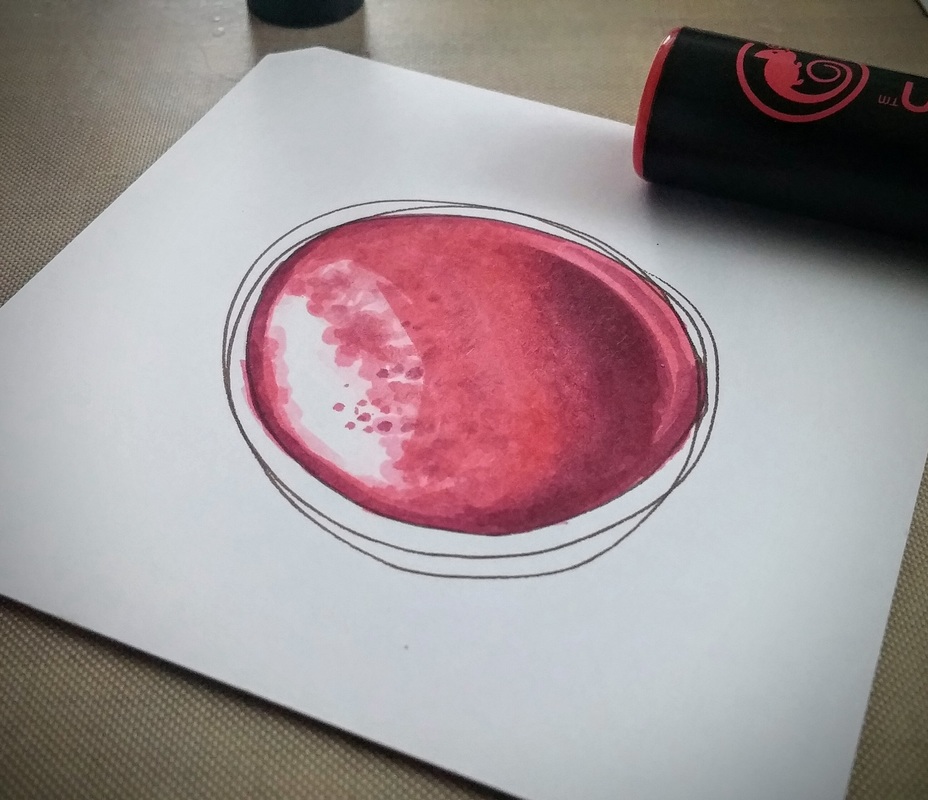 Step 8 Continue fusing and blending, working with your lighter pen, to create a unified look. Remember: 1. Leave your brightest highlight uncolored. 2. Test your pen every time you fuse! 3. Layering the color is the key to achieving a smooth, glassy look. 4. Don't worry if you color outside the lines, you can fix that later. 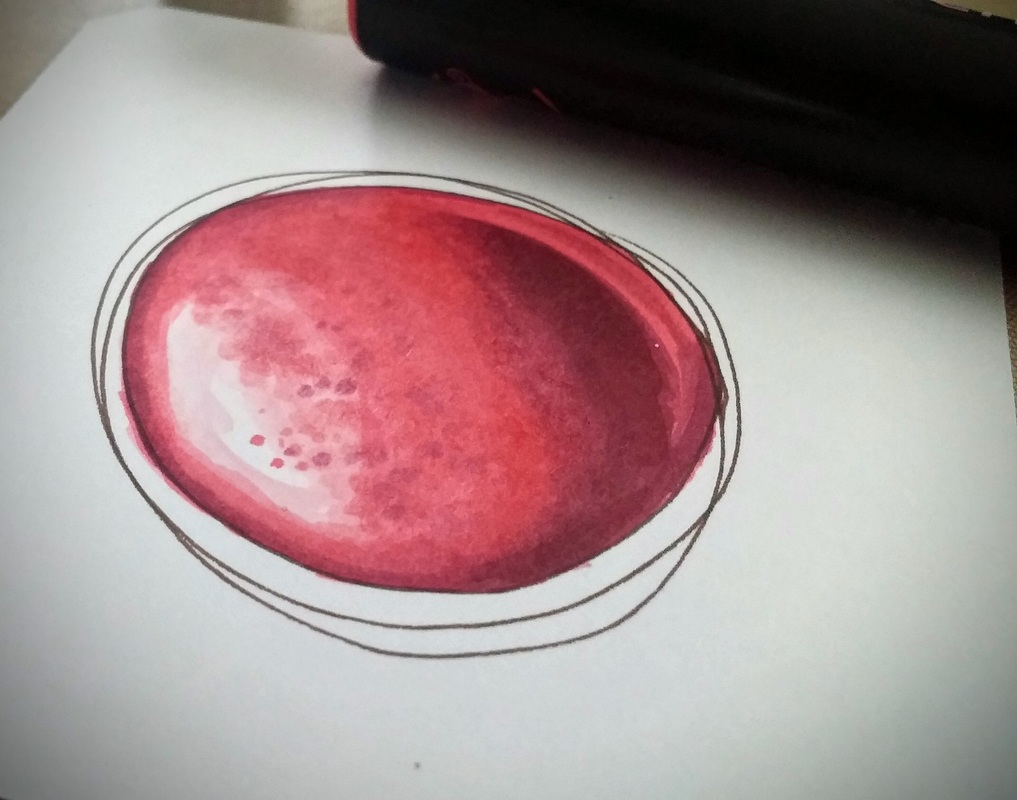 Step 9 Reinforce your highlights with a white gel pen. I emphasized the crescent shape, added some dots, and scribbled into my large highlight. I love the results so far! 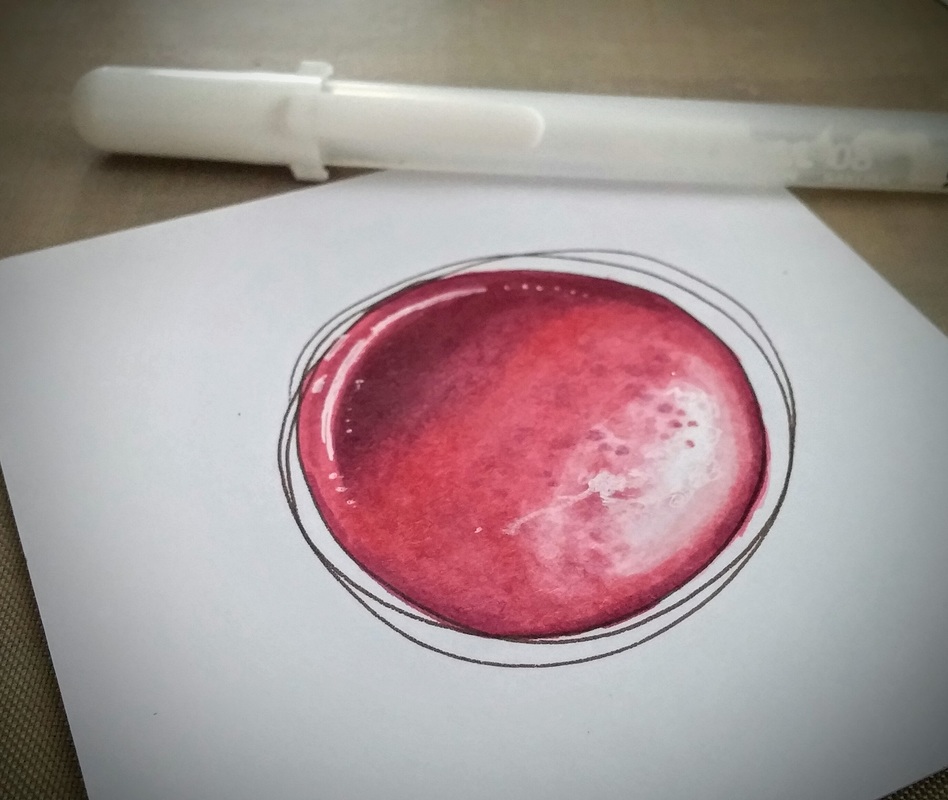 Step 10 Add finishing details. I reinforced the fine line that went around the edge of my gem, which had the effect of covering my mistakes! I added a few more "wires" that overlapped my gem. I used the Sky Blue Chameleon Pen to add a shadow. 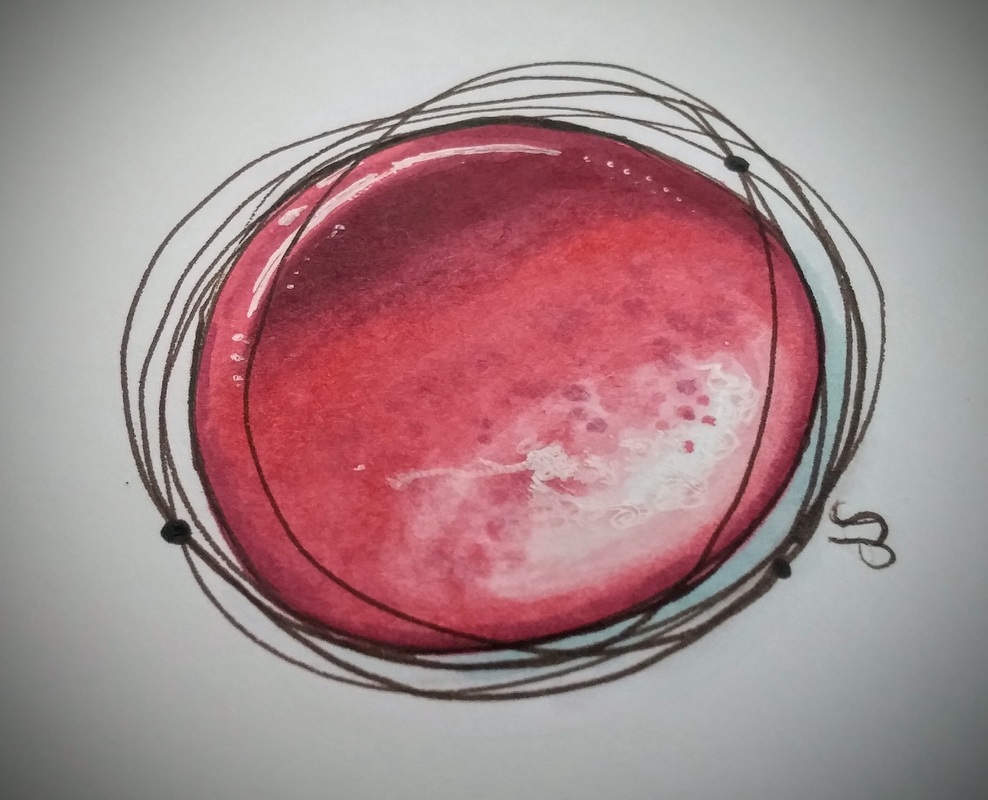 There you have it! I hope you enjoyed this tutorial. If you have questions or comments let me know in the comments below, or over on YouTube :) xoxo, 
Artist Tiles - Amazon
Chameleon Pens - Amazon For Gemstone Warm Tones Set Burgundy / RD5 Red Coral / RD2 For Shadow Baby Blue / BL2 also found in the Blue Tones Set Pigma Micron 05 - Amazon White Gelly Roll - Amazon These are the supplies I chose to use. For this technique, the only requirements are alcohol markers for coloring and water-based or pigment-based fine line pen. The Chameleons make it super easy by allowing gradient color. Try it with your supplies, and see how it goes! |
Enjoy
Art + Inspiration in your inbox! Usually 2x monthly, sometimes a bit more :) 
Join me for
|


 RSS Feed
